
No products in the cart.
Vintage Turntable Information
Turntables can be amongst the most temperamental of hi-fi components, requiring adjustments from the needle tip all the way to the feet at the base. Even the most highly 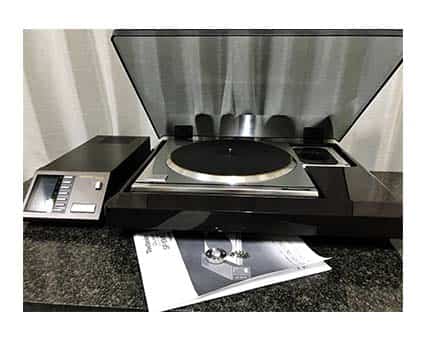 regarded record players can be easily affected by basic flaws in positioning, adjustment or support.
Most budget turntables come pre-assembled and are often pre-adjusted. These come with a tonearm and cartridge so there is no work required.
As you move up in price it is common for assembly and adjustments prior to use. Some tools that may be required are a good set of small Allen keys, a set of small precision screwdrivers and a pair of needle nose pliers. These are the minimum requirements for most set up work, including fitting and adjustment of the tonearm and cartridge. There are of coarse cases where special tools specific to your brand may be required, but that is uncommon even in high end equipment.
There are many things that can cause disturbances to your turntable and these can come from many different sources. The sound vibration from the speakers, vibration from walking transmitted through the floor, and even ambient noise from outside vibrating your house can sometimes effect a turntable. A good test to quickly isolate issues like this involves placing the cartridge on a record that is not spinning. Turn the volume up to your normal listening volume and tap gently on the table, then the deck, then try to walk normally near where your deck is positioned.
The ideal support for a turntable is a perfectly level, dense low resonance table that is positioned far away from vibration sources including speakers. Sometimes a listening room floor may cause enough of a problem that a wall or ceiling mount solution may make more sense. This kind of support is the best to avoid floor vibration issues completely but can be more difficult to implement. Most decks usually have some vibration isolation built in ranging from rubber feet to being suspended within the plinth. There are after market solutions available and some people even employ their own solutions. I have used tennis balls that were sawed in half before very successfully, and I am sure people have their favorite home remedies if you were to ask around.
The next step is set up. The basics include leveling your deck. This first step ensures the stylus tip can sit properly within the record groove. This is usually done using a very light level starting with the plinth. If your support is already level there should not be any action required unless. If for any reason adjustment is required most times it can be accomplished easily as most turntables have adjustable feet.
Second is to check if the platter is level. Most decks have a fixed platter position that should be parallel to start with unless something is wrong with a bearing or the platter is warped. Suspended designs allow some degree of adjustment and can be found on some decks such as idler wheel designs.
Third we check and adjust the tonearm and cartridge. These adjustments are usually done together and must be done using a service manual for your specific tonearm. This information can be often found on a manufacturer's website, but in the case of vintage items sometimes other resources may be necessary. If your cartridge is pre-fitted then it is a basic procedure involving only the setting of tracking force. This can be accomplished by moving of the counterweight on the back of the tone arm, and with the bias adjustment knob if present which changes the sideways force in order to compensate for the inward pull of the record groove.
Cartridge manufacturers will often recommend a suitable range of down force between 1.5 and 2.5g although this can vary with some cartridges. With that weight as a starting point it is sometimes possible to get sound improvements with some gentle experimentation.
As a general guide, if sound reproduction is dull or sounds lifeless downforce may be too heavy, while aggressive and thin tone presentation could mean the tracking weight is too light. Both can end in a damaged record. If force is to light the cartridge can mistrack clipping record grooves, and if to heavy the stylus tip can be damaged and cause wear to the information encoded on the record.
Most arm weights are marked, but to be accurate sometimes dedicated cartridge scales can be used.
It is important to note that with vintage gear some components may be affected by age and may need maintenance. This can include fader lubrication, contact cleaning, and replacing fuses, and capacitors. These things should not dissuade you from vintage gear as the reward is often well worth the trouble. Always consult your models service manual when considering maintenance. For vintage models these can be obtained from a dealer, or an on-line Hi-Fi resource.